Showing posts with label wreath. Show all posts

Friday, January 27, 2012

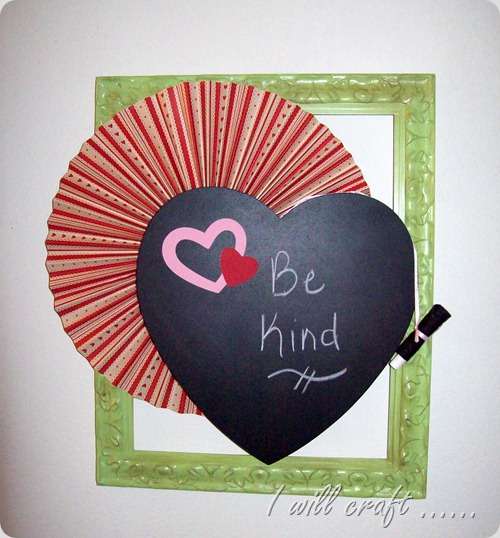
Chalkboard Heart Wreath

It was time to swap out my vintage holiday wreath for something different.  I knew with all the great wreaths I’ve seen with a picture frame as the base that I wanted to do something with one of the many frames I have.

Here is what I came up with.

Valentine Wreath by June @ I will craft

Do you love it as much as I do?

I knew I couldn’t spend a lot of money and wanted something heart shaped and just about did a happy dance when I saw a chalkboard heart in the dollar spot section at Target.  It was $2.50 and I knew it was perfect for a valentine wreath.

 100_9303

The chalkboard came with a felt covered chalk stick attached and ready to use to make a personalized message.

100_9304

I used two sheets of the kraft valentine paper I picked up last weekend for less than 10 cents a piece to make a large rosette.  I had the frame on hand.  It was part of my gallery wall. 

100_9300 I thought “Be Kind” was a great reminder to see everyday.

My chalkboard wreath is now hanging on my door so please feel free to stop by and leave me a message. :)


June

I usually link to these fabulous parties:

Friday, January 14, 2011

$3 Thursday Crepe Paper Rose Wreath

Oops, it’s Friday.

What happened to Thursday?

Oh well, better late than never.

I made this wreath last week and arranged a display for it yesterday.

100_5465

I wanted a new wreath and since I didn’t have a Valentine wreath I decided to make one.

I guess this really could be used for more than just Valentines day since it isn’t a heart or screaming Valentine.

I started with a wreath from the dollar store, $1.

An after Christmas clearance package of red crepe paper, $0.15

and about a third of a yard of the black and white fabric I bought for $1.29 a yard.

 100_5466

I made about 20 rolled paper flowers from the crepe paper in various sizes.

I wasn’t very concerned about the shapes and sizes.

Each flower is made from about a yard of crepe paper.

Some are bigger and flat, others are smaller and thicker.

They all worked for me.

I know most people use a circle base and lots of hot or fabric glue when they make rolled flowers.

I however rolled my flowers until there was about 2” of paper left then attached some red liner or Wonder tape.  I covered the tape with the end of the crepe paper.

I know some of you are probably cringing that I used red liner tape but I’ve come to realized I bought the tape to make crafting easier so I’m going to use it to make crafting easier.  No burnt finger and long hot glue strings.
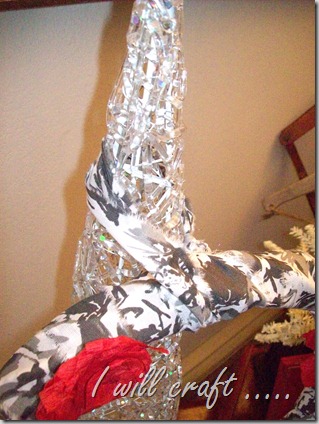
 100_5467

I tore strips of fabric about 2” wide and wrapped them around the wreath base.

With my first piece I tied knot to keep a loop of fabric to hang my wreath if I want.

I just wrapped one strip around the other so no glue or adhesive needed.

I finished off by tying the end of the last piece on the loop of the first piece.

Easy peasy.

And it will be a cinch to change the fabric if I want to update or reuse the wreath base.

100_5468

I laid out the flowers until I was happy and then broke out the red liner tape once again.

A little tape on the back of the flower and stick them to the fabric covered wreath.

Quick and easy, and less than $3.

I think it might just be love at first sight.
100_5469

The wreath helped me make a Valentine display in the corner where my Christmas trees were displayed.  I just couldn’t put the spun glass looking trees away yet and I love the display.

100_5464

100_5465

Cost:

Wreath      $1

Fabric    $.65

Crepe paper     $.15

Red liner tape      craft supply

Total cost:      $1.80


I usually link to these fabulous parties:

Friday, November 19, 2010

Paper wreath

100_4261
I’ve been seeing lots of great wreaths lately and it reminded me of a wreath kit I bought on clearance this summer from Oriental Trading for a couple dollars.
The kit was fairly simple, a Styrofoam wreath and ten packs of 1” x 6” double sided papers.
100_4218
I grabbed some push pins, the remote and started making the wreath.
I folded the ends together and made a crease about half and inch from the end then used a pin to stick it to the wreath.  I just started on the outside of the wreath and kept adding layers all the way to the inside of the wreath.
The kit came with about 500 slips of paper, I still have about 200 left so used about 300 slips of paper and stick pins.   The pins didn’t come in the kit but I had just recently bought a box of 1,000 of them at the dollar store. 
Word to the wise… look closely at the pins in the dollar store.  About 20% of the ones in my box had blunt end or only a slightly angled end!  It made pushing them through two layers of paper a challenge to say the least.  It was a good think there were 1,000 in the box so I didn’t think twice about about throwing them away.
 
100_4263
I love the color combination.
100_4262
I couldn’t decide on a color of ribbon from the papers so I decided on a wide gold ribbon that I had.
100_4264
Close up pictures.
100_4265
100_4266
This was a holiday wreath and I really like the pink, green and blue for Christmas but I think it would be a great wreath for year round as well.
100_4261
What holiday or year round wreath have you been working on?
June
Linking to these parties:
Catch As Catch CanThe Boardwalk Bragfest

Tuesday, June 1, 2010

Dollar store wreath


I've seen lots of book page wreaths and have been wanting to try one. I knew I wanted a wreath to hang outside on my patio and knew the book page ones would not hold up as I would like. Yesterday I had one of those moments and thought I could get a similar look with plastic bags. I know I had lots of them around and most of them are white. So I decided to give it a try.

I started with a plain wreath from the dollar store and a stack of plastic Target bags. I did use all Target bags as I figured they would all be the same size. I found out there was some differences in the bag sizes but were all pretty much the same.

I didn't take pictures of cutting up the bags but I cut off the bottom of the bag and the handles to make them a rectangle shape. I decided I wanted only a white wreath so I cut the bag into two parts, one with the bulls eye logo and the white part that I was going to use instead of book pages. You can see the stack of bulls eye logos and a stack of the cut up white part. I cut them to approximately 5 x 5, but some were more rectangle, about 3 x 6. I would try to get them a bit more even next time as if you look closely at my wreath you can see that some parts of the wreath are thicker than others. That is due to the size of the white pieces I used.

I decided I wanted to cover the base to make a bit more of an even base to hot glue the sheets to so I used the bulls eye logo part of the bags. I just sort of wrapped them around and hot glued them onto the wreath.

Here is the wreath covered with the logo part of the bags.

Then I just started gluing on the white sheets over the wreath. Here it is part complete. I think it took me just over an hour to completely cover the wreath. I did it in front of the TV, I suggest you do the same.

Completed wreath, finally done.

I hung the wreath outside on my patio on a wreath hanger I already had. I did spray a little bit of a shimmery gold spray paint on it to give it a bit more shine but I don't think anyone but me would notice that.


Project cost $1.00 plus some basic supplies I had on hand.
Time - 2-3 hours including time cutting up bags

Supplies used
Wreath $1.00
25 Target bags cut up
Low temp glue gun
glue sticks - I used two

Hope you enjoy this and try it yourself.

Happy Crafting - June