Showing posts with label bags. Show all posts

Monday, April 18, 2011

Happy Earth Week - {Eco Friendly Purse}

A thrift store in a neighboring town advertized a re-purpose contest for earth day.  I thought, hey, I’m re-purposing all the time, I can make something to enter.  Who knows, maybe I can win the $50 gift card they are giving away.  Can you imagine how much stuff you can get at a thrift store for $50?

I had to try to win it.

I had a few ideas on what I was going to make but the week before the item was due I got so sick and tired that I had a hard time making anything.

I had told one of my sisters about the contest and I knew what she was entering so if I wanted a chance at winning I knew I really needed to step and and enter something good.  I gave it my best shot and completed a purse that I cut out a month or more before.

100_6852

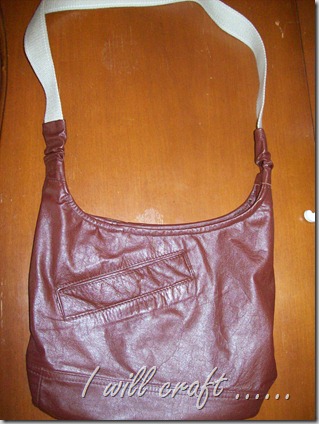
The whole purse is made from thrift and recycled materials.

I used a leather jacket, a shirt and a belt.
100_6844

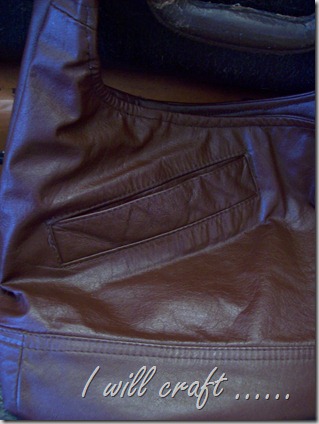
I cut it out so I could use one of the front pockets from the jacket on the outside of the purse.

100_6846

I think I’m really going to like having a pocket on the outside of the purse.

100_6850

100_6847

My daughter had this fun retro looking shirt with a mushroom pattern that was beyond repair. 

100_6851

I loved the pattern so kept the shirt knowing one day I’d use the material.
100_6848

The handle was a belt I picked up free at a garage sale for the D-rings. 
100_6849

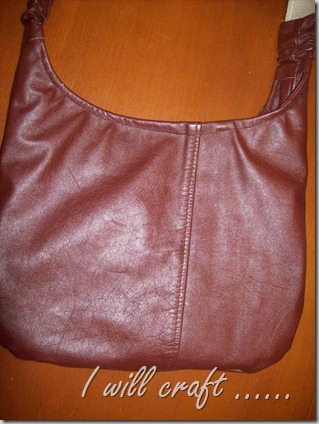
I love the rustic look of this purse and the buttery soft leather it is made from. 100_6843
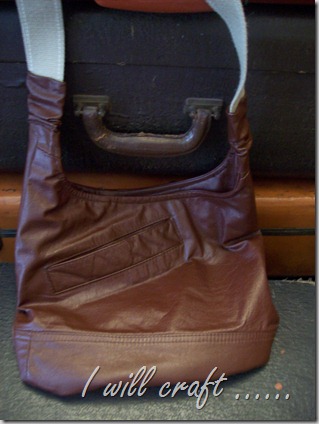
I think this will be one of a whole lot of bags I make from the ever growing collection of leather and suede jackets I have.

I’m not sure if I’ll win the earth day re-purpose contest but either way I win, I’ll have a new to me purse and feel good that is a completely eco friendly purse.  It’ll be nice however if I have a purse and $50.

June

I usually link to these fabulous parties:

Wednesday, June 23, 2010

Dollar Store bags

Who doesn't love checking out dollar stores just to see what they have? I know I like to go in, there is almost always something that I end up buying. Whether it is powdered drink packs or a home decor item waiting to be revamped.

Monday I got this package in the mail.
Swap-Bot. Thanks to my wonderful partner inside were these two bags made from a table cloth! I can't wait to try this on my own. Think of it, two bags and the envelope it was mailed in for $1 plus sewing supplies and one set of handles.


I don't remember every seeing any of these thicker table cloths at my dollar stores but I'll be on the look out for them.

I love the colors, and the bags are lined with the same material on the inside so they can be easily wiped out if anything spills in them. I picture one with a flat bottom for grocery bags. I'll let you know if, no make that when, I find a table cloth and make my own bags.

Tuesday, June 1, 2010

Dollar store wreath


I've seen lots of book page wreaths and have been wanting to try one. I knew I wanted a wreath to hang outside on my patio and knew the book page ones would not hold up as I would like. Yesterday I had one of those moments and thought I could get a similar look with plastic bags. I know I had lots of them around and most of them are white. So I decided to give it a try.

I started with a plain wreath from the dollar store and a stack of plastic Target bags. I did use all Target bags as I figured they would all be the same size. I found out there was some differences in the bag sizes but were all pretty much the same.

I didn't take pictures of cutting up the bags but I cut off the bottom of the bag and the handles to make them a rectangle shape. I decided I wanted only a white wreath so I cut the bag into two parts, one with the bulls eye logo and the white part that I was going to use instead of book pages. You can see the stack of bulls eye logos and a stack of the cut up white part. I cut them to approximately 5 x 5, but some were more rectangle, about 3 x 6. I would try to get them a bit more even next time as if you look closely at my wreath you can see that some parts of the wreath are thicker than others. That is due to the size of the white pieces I used.

I decided I wanted to cover the base to make a bit more of an even base to hot glue the sheets to so I used the bulls eye logo part of the bags. I just sort of wrapped them around and hot glued them onto the wreath.

Here is the wreath covered with the logo part of the bags.

Then I just started gluing on the white sheets over the wreath. Here it is part complete. I think it took me just over an hour to completely cover the wreath. I did it in front of the TV, I suggest you do the same.

Completed wreath, finally done.

I hung the wreath outside on my patio on a wreath hanger I already had. I did spray a little bit of a shimmery gold spray paint on it to give it a bit more shine but I don't think anyone but me would notice that.


Project cost $1.00 plus some basic supplies I had on hand.
Time - 2-3 hours including time cutting up bags

Supplies used
Wreath $1.00
25 Target bags cut up
Low temp glue gun
glue sticks - I used two

Hope you enjoy this and try it yourself.

Happy Crafting - June