Showing posts with label revamp. Show all posts

Thursday, May 5, 2011

Thrifty Thursday – Perpetual Chalkboard Calendar

You may realized that today is not a $3 Thursday.  I didn’t want to share more cards so I thought I would share this thrifty calendar.  It is made a few items that cost under $3 so close enough for me….

This was my original idea for the earth day revamp contest but I’m sort of glad that I finished it after the fact so I have it in my home now.
100_7261

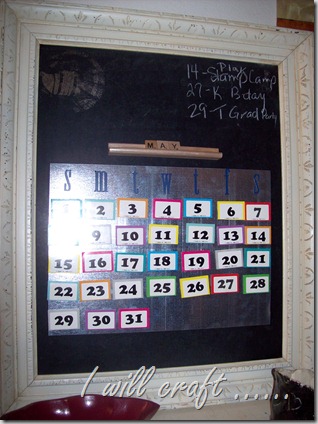
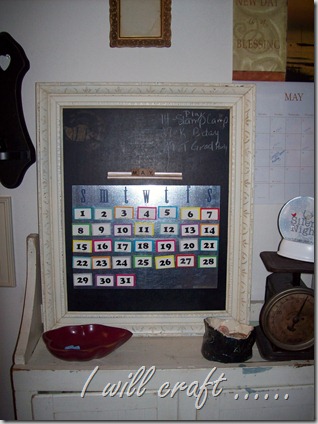
I made a perpetual calendar with metal flashing, game pieces and some scrabble tiles all in a framed vintage chalkboard.
100_7267

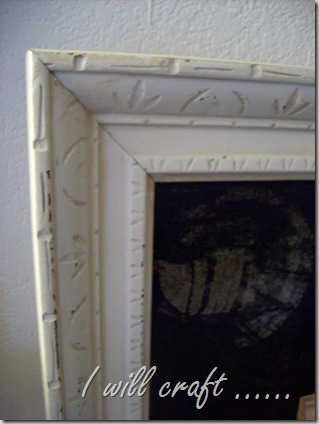
I used a frame I picked up at the Goodwill outlet.  I think it was just over $2.  I don’t remember for certain as it was priced by the pound.

100_7266

I had a vintage chalkboard with a thin, plain frame.  I did have to cut it down a little bit to fit the frame but I made sure to keep the cool horse graphic on it.  I’m assuming it is a horse of some sort.  I can’t read any name or anything else that might lead to the reason for the horse. 
100_7270

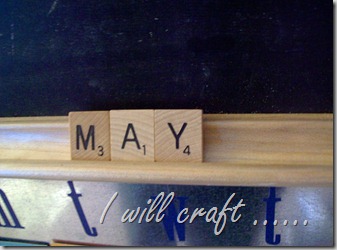
I attached a scrabble tile holder above the calendar and picked up all the tiles needed for each month.
100_7271

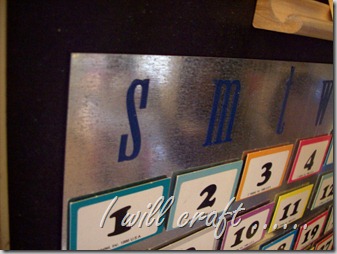
I used four pieces of metal flashing for a magnetic surface for the calendar.  The letters are vinyl scrapbook stickers.

 100_7264

The number pieces are from a game I picked up at the thrift store.  I had to cut the pieces in half to get just one number.  I sometimes look at games to see what type of game pieces they have.  They can sometime make fun additions to crafts.
 100_7268

   Although there is chalk and some space to write I think I might add some Post its to the board to jot notes down.  It is sitting by by front door so would be easy to pick up notes on my way out.  Well, easy if I remember to pick them up.

100_7272

I  like my new calendar and love that the numbers are magnetic so I only need to witch the numbers around and the scrabble tiles to each new month.

Supplies:

Vintage chalkboard           ~ $2, I don’t remember exact cost

Vintage frame                 ~ $2, paid by the pound.

Metal Flashing                 $.22* each, used four

Scrabble tiles and holder              $3 with lots left for other projects

Number game pieces              $1.50 with lots left over

Scrapbook letters                               craft supply

Magnets           ~ $2 – I used about three rolls

Foam tape        craft supply


Total cost    ~ $12**

I paid by the piece for the metal flashing.  They are 5 x 7 and I found them sold in a pack of 100 at Home Depot but asked and was able to buy part of the package by the piece.  Maybe it pays to look hopeless in a home improvement store…. :) 

** I have lots of the Scrabble game and other game left for other projects.

At first I thought I wanted a more eclectic look with various numbers but in the end I decided I like the streamline look of these.  I can always add other numbers if I decide later.  I’m thinking dominoes, mailbox numbers and bingo numbers for start.  The options really are endless.

I’m debating whether I should put this in my Etsy store as it would be a great addition to the store but I just can’t make myself list it…yet. 

Maybe one day.

This weekend there should be lots of garage sales and I’ll be on the lookout for more vintage chalkboards.

What thrifty finds have you found lately?

June

I usually link to these fabulous parties:

Wednesday, May 4, 2011

Goodbye and hello….

100_6950

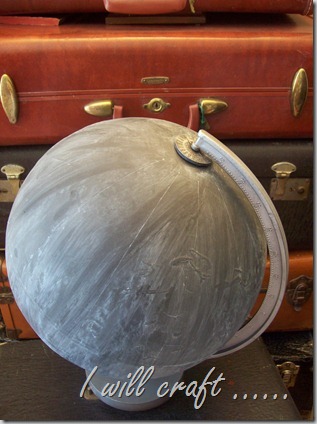
This week I had to say goodbye to my vintage chalkboard globe.  I loved the look of this globe and was a little sad to see it sell.

100_6956

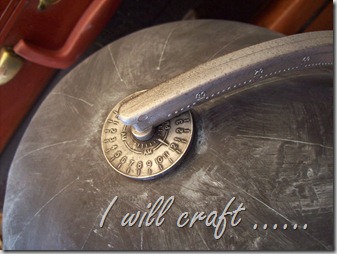
I loved how this makeover turned out, especially the hammered aluminum finish on the metal frame.

But, I’m sure it will have a good home in Pennsylvania where it is going.  Packing it up did help inspire me to finish my second chalkboard globe.

Say hello to chalkboard globe, number two.

100_7241

Isn’t he handsome.  Somehow I think a globe must be masculine….

100_7243

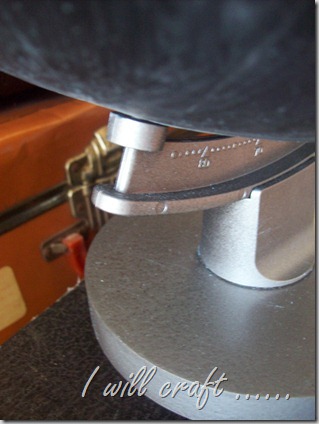
The frame on this globe was a bit different than globe number one.

100_7247

The base is wood and I had a hard time deciding if I should paint it or not.  In the end the hammered aluminum finish won out for both the plastic and the wood.  It was nice to see 'Made in the USA’ on the bottom of the base.

I’m hoping to sell this globe as well and if so I do have globe number three in waiting.  He however is still in it’s original colorful glory but I’m not afraid to paint it if when I say goodbye to globe number two.

You can check out globe number two in my Etsy store along with other fun and funky home décor items as well as my handmade cards.

I’m hoping to find a smaller globe in my price range.  I think a 6” chalkboard globe would be a fun addition to my desk.

100_7242

I wonder where in the world globe number two will eventually call home.


June

I usually link to these fabulous parties:

Saturday, April 9, 2011

Coffee bag pouch

One nice thing in my town for a crafty and thrifty gal is our SCRAPS shop.  SCRAPS is St. Cloud Recycled Art Project Shop.  It is just that, a ‘shop’ of items that can be ‘recycled’ into art projects, and it’s all free.  Yep, a thrifty crafters best four letter word, free.

You can donate or pick up items that can be used for crafts.  I’ve donated some supplies I’ve had and items that I saved for ‘one day’ and decided that that day might not come for me.  It is a place to donate those things that you might look at and think that someone can make something with this.  Whether it is yogurt containers, egg cartons, fabric scraps, buttons, beads, plastic, paper, wallpaper, tea tins, foam, patterns or just about anything else you might imagine, it might just be there.

I went the other day hoping for some bubble wrap and just to see what was there as I haven't been there for months.  I lucked out and found one piece of bubble wrap and then  I saw a bunch of Starbucks Coffee bags.

My heart raced with the possibilities.

I just knew I needed to do something with them.  I wasn’t sure what I would make with them but knew I would have fun trying to figure out what to make with them.  The people in the shop asked what I was going to make and I said I wasn’t really sure, maybe a bag of some sort but I knew I needed to take a few to see what I could make with them.

I went searching for bag patterns but wasn’t really happy with anything I found.  I remembered that I had some zippers I got last summer so I decided to make a zippered pouch.  After some searching for some zipper tutorials I finally decided that I should attempt to make a zippered bag.

This is the first bag I made.100_7009

I used four of the same bag so the pattern was the same front, back and on the inside.

100_7010

I realized that it was really ‘crunchy’ and a bit too bulky to use the foil packet for both the outside and the inside lining.

100_7005

For my second pouch I didn’t line it at all.  The front and back are the same, it is the top of the bag from the first pouch I made. 

I decided that I didn’t like the way the zipper turned out with a lining.  I didn’t like that you could see all of the zipper.

100_7006

These are the latest two each from one bag.  One side has the top of the bag and the other has the bottom of the bag.

100_7008

I lined these with some light cotton fabric I had also picked up for free.

You gotta love when you use items right after you pick them up.

100_7011

I thought about making some smaller containers but wasn’t sure exactly what I pictured in my head would turn out so I made a relatively simple container from two bag.  For now it will hold the zippered pouches I made.

I’m thinking of taking them to an indoor flea market next weekend with a few of my sisters.  We are planning on selling some of our crafty items.  Any idea how I should price them? 

Mostly free/recycled materials and I’m sure my sewing skills leave something to be desired but I think the idea is fresh and original for this area.   At least I haven’t seen anything made from coffee bags around this area.

I’ll only have a few to sell and I would like to price them to sell but not completely give them away.   Really I would appreciate any ideas on how to price them.  I was thinking around $5 but I’m not really sure.  What would you pay?

100_7009

Thanks,

June

Saturday, February 5, 2011

The power of paint

My painting time is extremely limited in the wintertime but I did recently finished revamping a few vintage pieces to list in my etsy store.

I shared some of the pictures with you in their original state here.

I painted two wall pockets with silver and then glazed them to tone down the silver.  They ended up looking like aluminum to me and I really liked the final results.

100_5754

Look at the detail of this piece – wonderful.

100_5755

One almost has a bronze look to it.

100_5756

I love the look I got with the glaze I used.

I think I’ll have to use it more often. 100_5757

I don’t know what I would put in it to not distract from its beauty.

 100_5759

I love this aqua accent mirror, it was another vintage piece that I updated with some paint and glaze.

100_5739  I coated this mirror in aqua with a light coating of some silver.100_5741

The glaze did wonderful things with the silver paint, making the glaze take on a silver grey tone.100_5742

I like that it toned down the aqua color to a more muted tone.


I fell in love with this fan shaped frame.

I had a hard time deciding what to put in the frame, finally deciding on a flocked vellum paper that I had on hand.


100_5751

How can you resist the bow on the top of the frame?

100_5747

A little crackling in the finish is a perfect compliment to the flocked paper.

100_5750

I love the different textures of the frame and the paper. 

100_5752

Hopefully someone else will love these details just as much as I do.


I’m still trying find a place in my apartment for this mirror.


100_5771I love it but so far can’t find a place for it so it might end up in my etsy shop as well.

Just look at the details of this vintage frame.

100_5772

The glazing looks a lot darker in the above picture than it does in person.

I wish I could find more of this frame.100_5773

Don’t you love the old ladder and miscellaneous pictures and frames that are reflected in it??

Not the best idea but heck that is what  a corner of my bedroom currently looks like.  Frames just hanging around.

This frame is plastic if you can believe it.

Lightweight, detailed, and it had an unbroken mirror still in it.

It cleaned up beautiful with a fresh coat of paint, glaze and windex.

100_5775


My thrifting this week wasn’t too great but I did get a few frames and a couple smaller pieces that I plant to clean up and update with paint and glaze.


Ahh, the power of paint…


June


I usually link to these fabulous parties:

Thursday, July 22, 2010

Chair Makeover - Part One

Last year I was suckered  rescued this chair at a garage sale.  I think I paid $5 for it.  

She had nice details.


At the time I had visions of a set of mis-matched wood chairs around my dining room table.   Well, the chair needed some work and I didn't find any partners for it so it sat at the end of the couch as a junk holder end table. 


I decided since I was home bound with my car in the shop that I was going to tackle this project.   A couple weeks ago I did some fixing of it as most of the spokes between the legs were loose or completely hanging out.   I attempted to put it back together as best I could.   The spokes are not all the way in but I'm on with that.  She is sturdy and looks great to me.  

Now to decide on the color.   Originally I was thinking black but realised that would not look good with the table I have.   A few weeks ago I rescued a couple other chairs that I think will go around my table when they are refinished so this lone chair needed to have another purpose.  

So I decided on a bit of color for this beauty.   I picked out a new spot for her (yes, I'm calling a chair her) and after looking through the paints I decide on red with maybe some black glazing on her to show the details.   I had two cans of spray paint that I paid $1.00 for both cans from the JoAnn's clearance section. 

I decided to use my spray can trigger that I bought in Wisconsin last week.  Boy it is nice to use that.   No messy fingers.  

Oh boy... she is looking rather orange.   I'm not sure that red was the right choice.  

I need to keep painting as the thought of taking the paint off was just too horrible to contemplate.    First coat on the top of the chair and it is still way too orange.

Painted the bottom and back to the top for a second coat.   Still looking orange and one can down.  Maybe there was a reason the cans were 50 cents??  What did I get myself into?   Maybe the second can will do the trick?  I can hope. 

It is a bit more like the red I had imagined after the third coat but still not what I was expecting.   Maybe it is because I'm looking at my burgundy patio set that this looks so orange.

Well, the wind picked up before I could put on what I hope will be the last coat of red.  I should be able to another full coat on it from the second can of paint I have.

I brought the chair inside to see it where I think it will go and to see if the color looks better.

Well, it does seem a bit closer to what I pictured but still not quite what I wanted.  Against the dark finish of the cabinet it does look red.

This is as far as I will get until next week however.   The wind was back today so no spray painting could be done on it.

Hopefully the rest of the spray paint and a dark glaze over it will have it looking pretty. 
Stay tuned for the finished chair next week.

June
   

Wednesday, July 21, 2010

Bed spring jewelry holder

Remember the bed spring I found on the side of the road that  I talked about last month?  

I knew immediately that  I wanted to turn it into a jewelry holder.  First I decided it would hang on a wall in my bedroom, just behind the door.

Ok, usually it will look like this with the closet door open and the room door open.

Why do I need a new jewelry holder?  
Because of this....

And this....

Yep, my jewelry is really in this much off a mess.  

The first picture is off a make shift jewelry holder of necklaces hanging on a craft vacuum just behind the the couch.   It started out innocently enough.   When I would sit on the couch after work I would take off my necklace and need a place to hang it up.   Soon a jumbled mess was born.

The green holder is my my bathroom, it was a bit more organized but still not near enough space for the amount of necklaces I have.  There would be multiple necklaces and bracelets on each hanger.

Yesterday  I finally stopped at a local hardware store to check out something to hang the jewelry on.  I settled on these S hangers.   There were a lot of sizes and a couple colors.   I decided on these becuase of the size and the fact that the box said $.09 each.   The tag in front of the box said $.19 so I wasn't really sure what the cost would be.   When I got to the register they asked if I knew the cost and I told them the two prices and luckily for me they gave  sold them to me for $.09 each!

I can't beat that price.  Some of the other ones were $.49. 

I decided to pick up five to see if they would work as I imagined.
 
They worked great so back I went today and picked up another 25 of them.   Total spent $2.90 with the five of them I bought yesterday.

I started hanging them on the bed spring ends.
On the top I used ten S hooks, one on all but the outside springs.   Can you imagine how organized my jewelry will be soon?
I decided to stagger the jewelry a bit so on the second row I only put on five hooks.
Then I took a pliers and closed one end of the hook.
The closed hook.
Start hanging jewelry on the hooks to help determine where to place the other S hooks.
Luckily this was the worst jumbled mess I had to deal with.   Two necklaces caught on the clasp of another necklace.
It is starting to look good now.

Bracelets on every other hook on the top of the holder.
This is the first necklace I made, I'm rather proud of.   It was a lot of work but it was worth it in the end.  I gave my sister a lot of crap good natured ribbing while she was teaching me how to make this.
The original stone broke so I even had to replace the big stone once.

The finished holder.   I have so much jewelry that a few of the hooks have two necklaces on them.

Ok, this is how I will usually see the holder, with the door open and covering a bit of it.


I'm loving the organized jewelry now.  

There you have it, my $3 jewelry holder.   I love it. 

Keep an eye out for a discarded bed spring to make your own. 

June

Linking to:
Make it Yours @ My Backyard Eden


giveaways
BWS tips button
Visit thecsiproject.com