Showing posts with label $3 makeover. Show all posts

Thursday, September 15, 2011

$3 Thursday – silver pumpkin – repost

Since I’ve been struggling to be creative this week I thought I’d share a project from last fall.   The weather has been a bit cooler and I’ve been thinking of decorating for fall soon.  This is one of the things I’ll be putting out soon.
 
Doesn't this silver pumpkin look like it was more than a dollar?
It reminds me of some glass pumpkins I have seen.
I got the glass look with a thrift budget.
A few weeks ago I picked up this pumpkin for 50 cents.
What a steal.  It still had the original price tag with $5.99 on it!
I knew I wanted to paint it so I gathered some painting supplies that I had on hand.
Silver paint, a shimmer gold paint and a gloss sealer.
I have painted a few projects with these cans already so the cost of paint per project was pretty minimal.
Since it was a bit windy today I set up a painting box.
I painted the pumpkin with a couple light coats of the silver paint.
Once the paint was dry I put some water on it.
Yeah seems strange but I thought it would help me get the look I wanted.
While the water was still on the pumpkin I sprayed silver and then the gloss coating on it.
I was hoping for some spots to help it look more like glass.
Since it was cool here today I did use a heat gun to dry the water drops.
The paint and gloss did dry into small drops, sort of like bubbles you might see in glass.
I wasn't able to get any good pictures to show the subtle texture it gave the pumpkin.
You will have to take my word for it.
It is there, just like I wanted.
It will be a great addition to my sweatshirt pumpkins from last week.
I like the contract of the sleek silver pumpkins with the more rustic looking pumpkins.
I'm not ready to pull out all my fall items quite yet but I did make a small display for now.
My cost for this silver pumpkin -  $.50
I did use some paint and gloss that I had on hand.
Enjoy,
June
Linking to these parties:

Thursday, March 10, 2011

$3 Thursday – Owl Trio

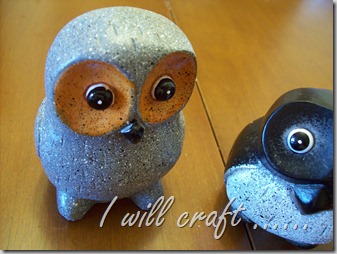
I found these cute little owls just hootin’ to come home with me.  Yeah, I said ‘hootin’ ’.

100_6437

I found them in the Target Dollar Spot.

100_6438

Have I told you lately that I love Target?

 100_6444

I mean look at these faces, could you resist?

100_6441

They just screamed screeched ‘bring me home.’

100_6442

I dug through the bottom bin, (How come all the good stuff is in the bottom bin?) but could only find two different owls.  I was hoping for three different ones.  I settled on one of the taller ones and two shorter, rounder ones.

100_6440

My first instinct was to paint them white or cream and glaze them but then I remembered the Looking Glass mirror like paint I picked out from Krylon.  I thought mirror looking owls would be nice.

100_6445

Then I read the label and you paint the back side of the surface you want mirrored.  Hmm, it sounded like the bottom coat, or in my case the final coat, was going to be dull and not mirror like.  I thought I might give it a shot and if it didn’t work out I had a can of Silver Hammered Finish paint I could fall back on.

100_6446

As it turned out I liked the finish I  got with the Looking Glass paint.

Here they are after a couple coats.

100_6452

Not a true mirror finish I first imagined but I liked it.  They weren’t as glossy as I wanted but a couple coats of a gloss sealer did the trick.

That gave them a bit more shine and I liked them a lot better than the more matte finish.

100_6475

Their faces don’t seem as sad to me know.

100_6474

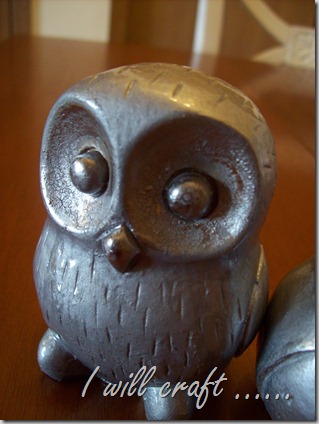
This one got a little crackly around the eyes.  I guess he is the older, wiser owl with a few wrinkles around the eyes.  Hmm, remind you of anyone?  I know I have a few more lines around my eyes than I did years ago and I’d like to think I’m a bit wiser. :) 100_6476

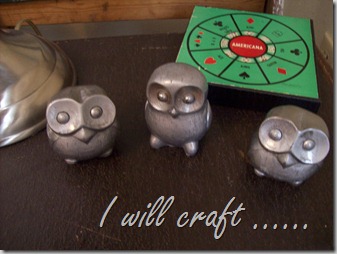
I like this finish.  It reminds me of silvery, aluminum, almost pewter look.

Now, where should my owl perch?

100_6478

Maybe they would like to play a game of Bingo?

100_6479

Or they could watch over my rainbow wall of ribbon?

100_6480

Or watch over the whole world?

100_6481

Or try to catch a butterfly or two?

100_6482

Maybe watch over my stack of suitcases? 

100_6483

Kind of like a Where’s Waldo but with owls.

100_6484

Oh, they you are.

100_6485

This one seems a bit shifty to me.

100_6486

Maybe they can perch on the suitcases I use as a night stand.

100_6487

I think they look a little sad there.

100_6488

Here they are on the paint splattered, chippy ladder behind the suitcase night stand.

100_6489

I kind of like the silver against the paint of the ladder.

 100_6491

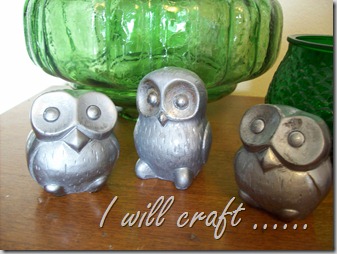
But then again, I like them on my dresser against the green glass.

Decisions, decisions.  I hope I’m wise enough to make the right decision on where my trio of owls should call home.

Any suggestions?

Where do you think they look the best?


Supplies:

Owls 3 @ $1 each         $3

Paint          Free – I won it

Total cost:  $3 for a trio of pewter looking owls


June

I usually link to these fabulous parties:

Saturday, September 11, 2010

Shabby Chic Aqua Organizer

Remember this organizer I found last month?


I loved it deep floral detail on the front and sides.
It had a wood look and tone but it was a plastic material.
It screamed 70's to me and not in a good way.


I finally finished cleaning, painting and glazing it.
I decided on aqua.
The aqua itself was a bit bright so I toned it down a bit with some glaze.
It really brought out the details.


I love the vine look on the side.


Six compartments should help anyone get a bit more organized.


For now I'm listing it in my shop, you can check it out here.  If it doesn't sell I won't be too sad.
I can use a bit more organization too!


Thanks for looking.

Thursday, August 26, 2010

Three Dollar Thursday

I thought I would start a regular post named Three Dollar Thursdays.
I will feature crafts that cost $3 or less tp complete.
  
I got a lot of nice comments on a few of my posts about crafts that cost about $3 or less so I've been thinking about other crafts that I can showcase that cost $3 or less.

Most of the crafts I show are usually fairly inexpensive but the ones I'm most proud of are the jewelry holder I talked about here, the $3 kitchen wall art I showed here and the covered photo albums I showed here.


On to my first official $3 Thursday craft.   I'll show you a reusable bag makeover.
I really try to use reusable bags but I know I can do better and can probably use a few more bags.
I sometimes don't immediately empty bags when I use them so the more bags I have the more that should be in the car at any given time for me to use.

This is what I started with, a cream reusable bag I bought from Walgreen's.
Walgreen's had a coupon this week for two bags for $1 so I purchased two bags to makeover.


I thought of possibly using some leather from one of the leather jackets I've found lately but in the end decided I wanted something lighter.

I decided to use this black and white floral print fabric I picked up at JoAnn's last month.


I paid $1.29 a yard.  Yep, that's right, $1.29 a yard.
Well technically I only paid $.64 (sixty-four cents) a yard for the piece I used.  I only used about 8 inches so really my fabric cost me about sixteen cents for two bags!

How did I get a yard of fabric for sixty-four cents??

I was at  JoAnn's one day I saw a display that said 90% off fabric.
I zoned in on it right away even thought I really wasn't looking for fabric.
The regular price was $12.99 a yard so I thought I would get a couple yards and maybe attempt to make of of those fabric flowers that are popping up everywhere in blogland.

When I went to get it cut I realized that there was a small piece of about a yard that was already cut. 
The gal at the cutting table asked if I wanted that piece at 1/2 off.
She said it would be 1/2 off of the sale price.
What???

I asked if that was right as it was already 90% off and she said yep,
it would be half of the $1.29 yard sale price.
Sold.
Consider it mine.

I thought about getting some of the other fabrics that were 90% off but I really didn't like them and didn't even need the fabric that I was buying.  :)

OK, back to my $3 craft.

I decided I wanted a big floral circle to cover the Walgreen's logo.
I had four logos to cover so I folded the fabric so it was four layer thick and I traced a couple different round items.


I made rough circles, I didn't care if they weren't perfect. 
I ended up cutting four different size circles.

I cut eight of the largest circle, four of the next circle and eight of the smallest two circles.
Here they are all stacked up.
The largest circle is about 7-8", the smallest one is about 2".


I gathered some fabric glue and some pearl brads I thought would tie the black and white floral print in with the ivory color of the bag.


I decided I didn't really like the pearl brad as the center of the flower so I looked in my supplies and decided to add a black flower to the center.  The black flower was about the same size as my smallest fabric circle so I decided not to use the smallest circles I had cut out.


Much better, the black flower is just what it needed.
I punched a hole in the center of the fabric circles and put the pearl brad through the black flower and then through all the layers of fabric circles.

 This is my completed circle flower.


I started a large spiral of glue over the Walgreen's logo.
I didn't want to completely glue down my fabric, I had about a 5" circle of glue.

I put the circles on the glue and then put a little bit of glue between the two large circles.
I thought they might flop down a bit, that's why I put a little glue between the two large ones.
I figured the smaller circles weren't big enough to flop down much so I didn't glue them.


Petty simple, here is one side all done.


I wanted to finish the other side right away so I pulled out the insert that was in the bottom of the bag and kept it inside the bag in case any of the glue would seep into the inside of the bag.
It didn't appear to be doing this but better safe than sorry.

I was able to fold the bottom of the bag so I could get a flat surface to attach the fabric circles to the opposite side of the bag.


I did the same thing for the other bag and ended up with this as my finished bags.


Close up of my circle flower.
 I'm sure my fabric will fray, and I'm OK with that.
I think I'll like them better the more tattered they get.


The two fabric embellished bags took less than 10 minutes to complete.


I might have to see if I can pick up a few more bags to embellish this week.
They might make great gift bags.


Now if I can just remember to use my reusable bags a bit more often....

Thanks for checking out my first official Three Dollar Thursday craft.

June